How to Save Office 365 Emails to Desktop Hard Drive Securely? Complete Guide
How to Save Office 365 Emails to Desktop / Hard-Drive/ Computer? – A question raised by a majority of Office 365 users. In a modern scenario, users may find it difficult to access Office 365 owing to an increase in cyber crimes. Hence, they want to save emails to local desktop in order to protect the data loss situation.
Moreover, due to the lack of backup solutions in Office 365, users cannot accomplish this. Although, Office 365 Account Holders need not bother about issues like how to save emails from Office 365 to desktop, how to export Office 365 mailboxes to PST, etc. This blog will help guide them to save emails from Office 365 webmail account to local system.
4 Simple Steps to Save Office 365 Emails to Desktop
- Step 1. Download & Open the Software on Your PC.
- Step 2. Choose the Mailbox Categories & Apply Filter.
- Step 3. Enter Source & Destination O365 Credentials.
- Step 4. Create Mapping & Click on Backup Button.
Different Techniques to Save Emails to Computer from Office 365
In the following section, we are going to discuss two different approaches in order to download the Office 365 mailbox data into the system.
Strategy 1: Manual Way to Save Email from Outlook Office 365
For manual strategy, your machine should have an MS Outlook desktop application to save Office 365 emails to PST format. The manual techniques include the following two phases:-
Stage 1: Configure Office 365 Email Account With Microsoft Outlook
First of all, you need to set up the O365 account in the Outlook application. For this, follow the below steps;
Step 1. Open Outlook and click on File >> Add Account.

Step 2. The next window depends upon which Outlook version are you using. If you are working with Outlook 2016 or above version, you will get the following window.
For Outlook 2016 –
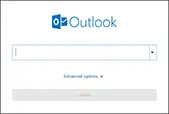
Here, you need to enter the Office 365 email address and click on Connect. If prompted, enter the password.
For Outlook 2013 & Below Versions –
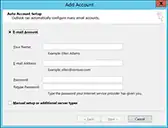
From the following screen, select the E-mail Account option and enter Office 365 details in it.
Stage 2: Save Email from Office 365 Outlook Webmail
After the completion of configuration task, export the email from O365 account to save in PST file format.
Step 1. Click on File >> Open & Export >> Import/Export.
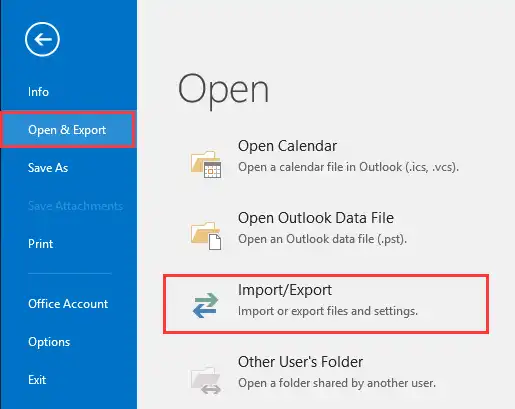
Step 2. From import/export wizard, select “export to a file” option

Step 3. In the subsequent window, click on Export to a File >> Outlook data file (.pst).
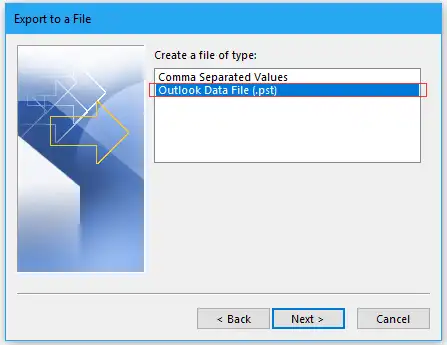
Step 4. Select the mailbox from configured Office 365 account that you wishes to backup >> Next.

Step 5. Afterward, select the destination location within the desktop to save the exported .pst file.
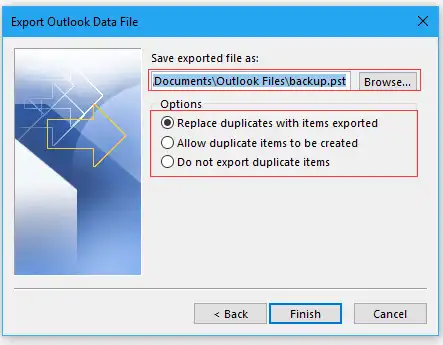
Step 6. At last, click on Finish to save Office 365 emails to desktop.
Limitation of Manual Procedure:
-
Tedious and Long Procedure: Activities like configuring an account, exporting from the application, etc. lead to a tedious procedure for users. They find such a strategy to be a lengthy workaround.
-
Require Outlook Expertise: Such a workaround is to be performed with concentration because if any problems occur then normal users cannot resolve them and will require Outlook experts to resolve their issues.
Strategy 2: Save Office 365 Emails to Desktop Using Alternative Software Solution
The alternative procedure includes the usage of software that is being developed to archive emails from Office 365 to computer hard drive. One such software is SysTools Office 365 Backup Tool, which enables user accounts of Office 365 save to local drive in a trouble-free manner.
Tool Enables Users with the Following Features:
-
Office 365 Save Emails to Desktop: Account holders of Office 365 can back up and archive their emails on computer desktop. This feature enables users to save emails in the system hard drive from the admin mailbox and user mailboxes.
-
Export Emails to PST: The major feature of this software is to provide save Outlook Office 365 email locally in Outlook PST file type.
-
Provide Multiple Filtering Options: Software allows its users to save selective emails to be backed up on the basis of mentioned date range.. Users can specify a particular time period from which they want to save their emails using the “From” and “To” filters.
-
Save Multiple Office 365 Accounts: The most useful feature of this application is that users can save Office 365 emails to desktop of multiple accounts in one go. Users can fetch details of all Microsoft 365 accounts and start saving emails concurrently.
Above all, the tool has a restore feature as well. In case, if you want to import PST to Outlook Web App, then it can be easily done by the same utility.
Step By Step Guide to Follow to Save Office 365 Emails to Desktop Safely
Step 1. Run the software and choose Office 365 as Source and Outlook as the destination backup platform.

Step 2. Check the desired mailbox workload and apply a date filter to export only the desired data. Click on Next.

Step 3. Use source Office 365 admin credentials to log in. Provide the source Admin email ID and application ID, then click on validate button.

Step 4. Select the destination path and location to save the destination resultant file. Choose the desired PST file size accordingly and click on validate button, then click on Next.

Step 5. Create a mapping between the source Office 365 accounts and destination paths. Choose any of the below methods and validate.

Step 6. Select the required user accounts and click on validate button. Then click on the Start backup button.

Conclusion
Well! It is no surprise that there is no option available that can backup or save Office 365 emails into desktop. Therefore, in this article, we have discussed two methods on how to save emails from Outlook Office 365 webmail. It is recommended that users should go with an automated method to backup their O365 data and save it into Microsoft Outlook PST file format. Because it is the simplest procedure for backing up and archiving Office 365 accounts, in a trouble-free way.

