

Outlook 2013, the earliest edition of MS Outlook is packed with various most demanded features like Sleek New Design to have a view of snapshots from calendars, People Hub feature for consolidating contacts from distinct sources, Attachment Reminder for reminding you about an attachment that you have missed to look up, Message preview to have a view of first line content of the mail without clicking on that, etc. With all these features, Outlook users can experience a new emailing environment.
Steps to Install and Setup Outlook 2013
If you are the one who want to configure this flourishing version of MS Outlook then, follow the steps given below:
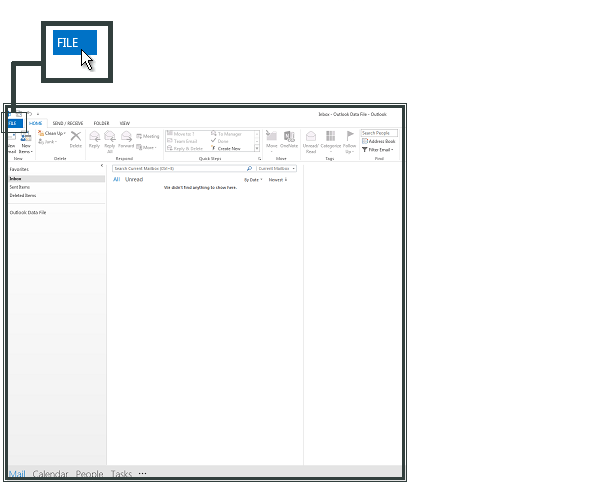
- Open Outlook 2013 and select File from top most tray of the Window
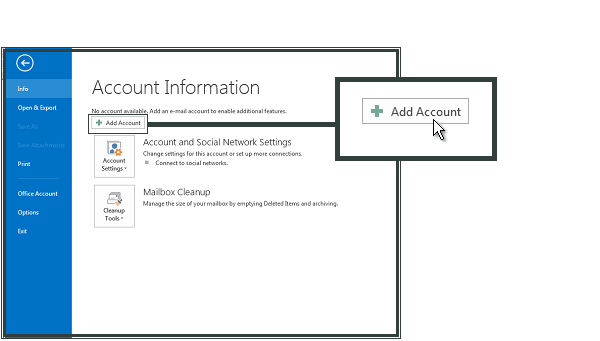
- The next window will show the Account Information -> Click Add Account
- Next wizard will explore more options that will allow you to go with Manual setup or additional server types, afterwards you need to click on Next
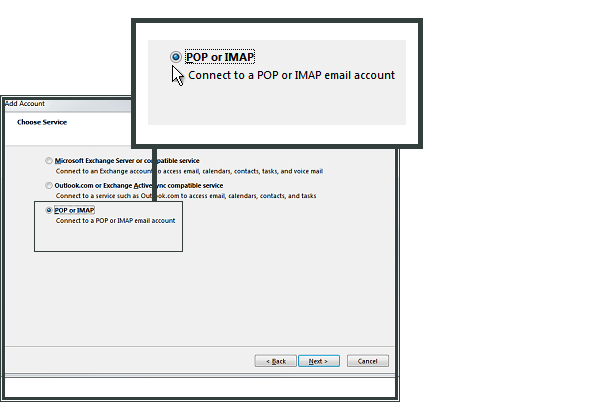
Pop or Imap
- Another window, permits you to add up POP or IMAP under Choose Service section then, click on Next
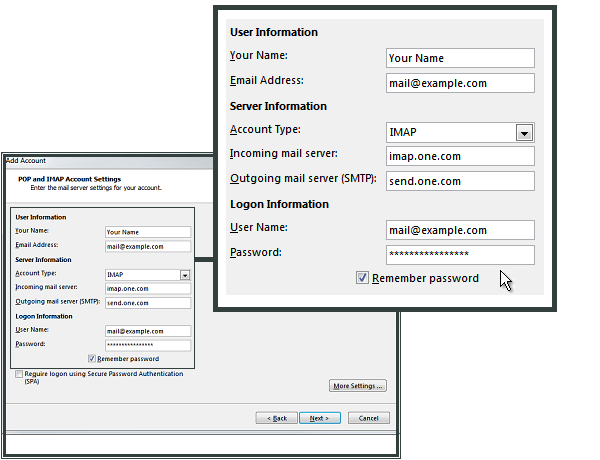
- Pop and IMAP Account Settings, this window will permit you to fill the crucial credentials like name, email address, IMAP or POP type, incoming mail server, outgoing mail server , email address and password

- Internet Email Settings, this window will let you manage Outlook Server settings by checking My outgoing server (SMTP) requires authentication
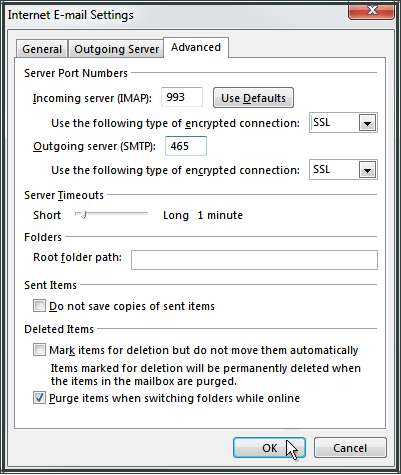
- Within same window, select Advanced option and fill port numbers for Incoming server and Outgoing Server then click on SSL for both of these, then click on OK tab and then Next

- Under test account setting, you will see a congratulation message for completing proper configuration then click on Close tab
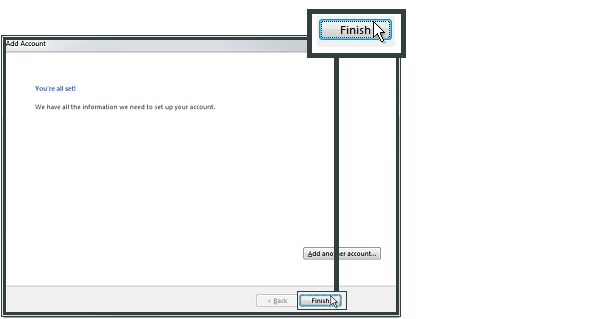
- Now, you are done with Outlook 2013 configuration, click on Finish
Once you are done with MS Outlook 2013 configuration at your Windows computer then, you will not face any trouble to access PST data that you have stored into computer few days back as you can add up the PST to the Outlook profile. The other benefit of having Outlook 2013 on computer is frequent addition of PST file that you have created after converting file format from other email application.


