

Familiarity is wished by many, but only gained by a few. In the rising world of technology; YouTube is all about YOU and presently one of the most dependable ways to easily showcase ‘yourself’ virtually to the world! Showcase a talent, raise a voice against or in favour of an issue, share media, let the world see bizarre events of your life, and what not!! There is just no stopping to it! It is an audio visual encyclopaedia you just got to have a video portraying what you need to showcase to the world and YouTube is the exact place to be!
Get Hands On Experience With YouTube
Step 1: Get the video to your system from wherever you have it. The video could be on a camera, phone, etc. So the first step towards uploading a video on YouTube is to get the video on your system.
Supported video formats by YouTube are:
- .AVI (Audio Video Interleaved)
- .MOV (For Mac)
- .MPEG or .MPG (Motion Pictures Experts Group)
- .3GPP (For mobile phones)
- .M4V (h.264)
- .WEBM (HTML5)
- .FLV (Adobe Flash)
- .WMV (Windows Media Video)
- .MP4 (iPod/PSP)
Step 2: Sign in to your respective account. As every account comes with its own set of channel just sign into your account via the channel it is linked with to upload your video.

Step 3: Click on Upload from top your homepage to begin with showcasing yourself.
![]()
Step 4: Click on ‘Select Files to Upload’ to browse the desired video from its respective location on your system. You can select one or multiple files at a time or for convenience; also drag and drop the video(s) to the space provided.

Step 5: Click on Open.
NOTE: If the account is not verified then a limit of 15 minutes is imposed on the video you upload. Longer videos can be uploaded simply by getting your account verified which can be done via text message. In the Upload Page you can view a verification link.


- Other than uploading a pre-existent video file you can also upload straight-away from a connected webcam. Get to preview recorded video before uploading.
- Opening the file will automatically begin uploading it. You will then be directed to a webpage where video related information and details can be provided.

Step 6: Provide the details. Some of the required set of information consists of a video title, description, tags if you would want to add any.

- Description of your video will help viewers to have prior knowledge that describes exactly what is being portrayed. And to stand out from all the rest; give a unique and genuine description to your video.

- A tag will help other users on YouTube to be able to locate your video by matching set of words linked with your video. E.g.: If you have uploaded a funny video tag it with ‘Funny’ tag so that YouTube users that make a search including the word ‘funny’ will have your video listed to them along with others having similar tags.

- Annotations i.e. notes permit you to add a notes or intervals to your video which you might have forgotten to apply.
Step 7: Select Privacy settings for your video. As in; a video set as Public can be searched and viewed by all. If it is a private video and you just want it to be shown only to the people on your channel then better it set it as private to avoid any violation of its contents. This way, you can designate viewers that should be allowed to view your video.
NOTE: These users must have an authentic Google account.
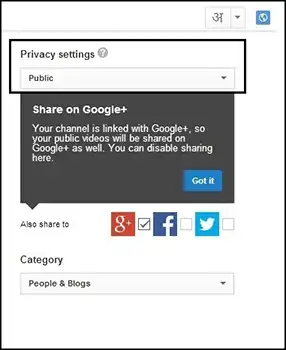
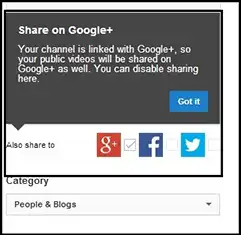
Step 8: Select the check-box given along with each video sharing option; Google+, Facebook, Twitter, etc.
Step 9: Go to Advanced Settings tab to set advanced options like; comments, license and rights ownership of the video, caption certification (if any), distribution options, location of video, date of recording, visibility of video statistics, and age restrictions on the video being upload. Save Changes.


Step 10: Get benefited! You can monetize your video by placing paid ads on it. Check out the complete guide on Google to properly place ads before or besides your video.


