3 Ways For Defragmenting Windows 7 Disk


When you want to write something into a file placed within a hard drive of your computer then, computer does not place the entire data in sequential manner. May be the half portion of data gets stored into starting of the disk and rest gets stored at the end of disk. It slows down the speed of computer system as computer takes time to read different fragments located distinct corners.
To avoid such circumstances, defragmentation of hard disk is helpful as it manages the disk free space that further reduces the time taken by computer to read a file. For defragmenting hard disk of Windows 7, here are given some methods:
- Using Disk Defragmenter
- From Command Prompt
- Using Batch File
Before getting started with these methods, check out the given information:
- Not any requirement to use Windows 7 computer in Safe Mode
- Not required to remove unused programs from computer
- No matter if you have scheduled a program or application to run, do not cancel it
- No need to stop running programs
- Deletion of temporary files is not necessary
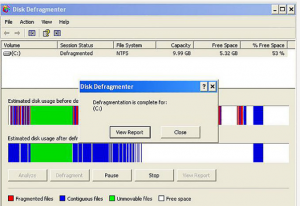
- Information about Red, Blue, and White Sections during defragment operation:
- Red: Disk portion where the file and directory data is stored properly.
- White: The space that is in unused mode.
- Blue: The area with fragments that can be gathered together for placing that into unused space so, that can be used within a file
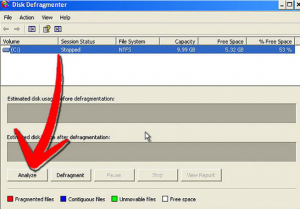
First Process for Defragmenting Windows 7 – Disk Defragmenter
- Go to Control Panel-> System and Security -> Administrative Tools-> Defragment Your Hard Drive Or You can reach to Disk Defragmenter from Windows Search bar
- Once you will click on this option, you will see the window, click on analyze disk tab:
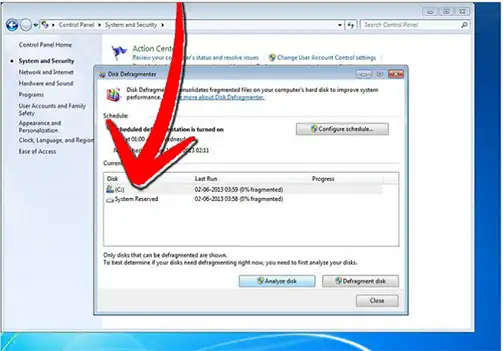
Analyze Disk
- The process to analyze the disk will take time according to size and amount of data stored within selected drive
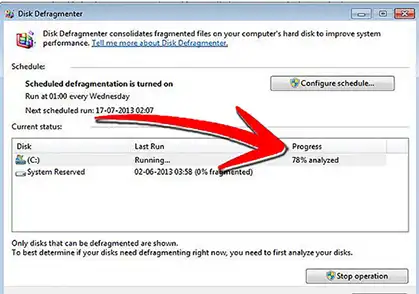
Data Analysed Status
- Once the process to analyze the disk gets completed then, defragmentation of the drive will gets started that can take the long time like overnight defragmentation
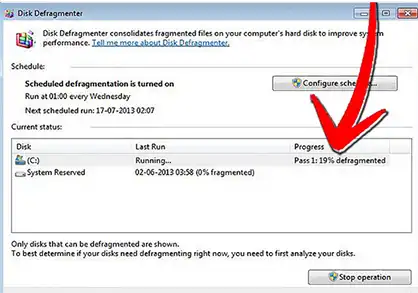
Defragmented Status
- If you want to stop or pause the process due to some concern then, click on Stop Operation tab. The benefit with this kind of pause is you can resume the defragmentation with the same point.
- For changing defragmentation schedule as per your requirement click on Configure Schedule
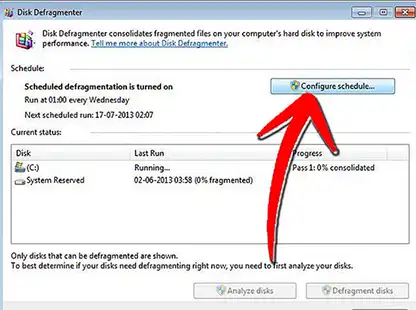
Change Defragment Schedule
- Go to day menu
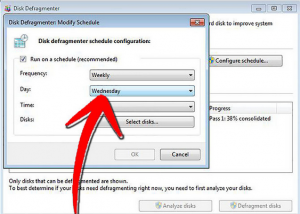
Select A Particular Day
- Select the day for executing defragment operation
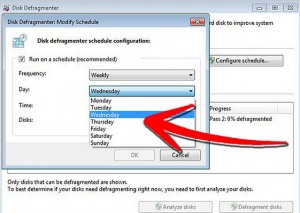
selection of day
- After selection of the day, click on OK to move on
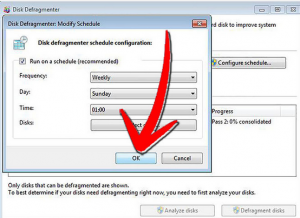
Move Ahead With Ok
- Click on Close to exit from the Window
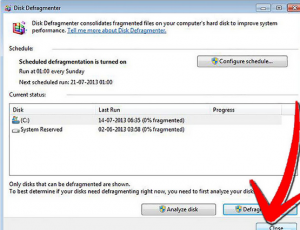
Exit from the process
- If you will move with Defragment now then the other screen will be like:
Defragment Now
It shows the defragmentation status and update.
Second Process for Defragmenting Windows 7 – Command Line
- Open Defragmenter using command line by typing dfrg.msc into Run Window
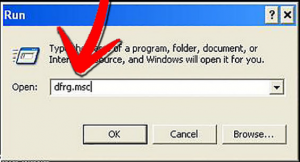
Run Command with dfrg.msc
- Click on Analyze tab to find out whether there any damage has taken place or all is going well
Click On Analyze
- The process to defragment is still running, wait until the process gets completed
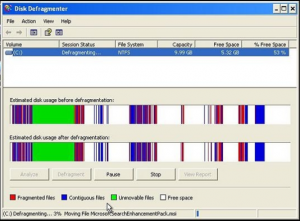
Defragmentation Is Running
Third Process for Defragmenting Windows 7 – Batch File Method
- Open a new text file and type the code – defrag C: -v –a
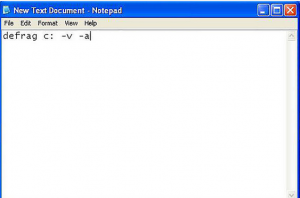
Create Batch File
- Save the file as defrag.bat so, it will be a batch defragment file

Save It
- After saving the file, click to open it. The other window will show you the procedure for defragmenting disk. The time taken for this process will depend on disk size, number of fragmented files, and total number of files

Defragment..Wait until the process completes
