

Updates for Android have always accelerated users’ excitement as each update comes with improved features, performance, and what not! But wait! Is Android 4.4 KitKat available for Nexus 4 users? Well, if you want to go for Android 4.4 KitKat there was seldom options available. Either you had to buy Nexus 5 with 4.4 KitKat OS preinstalled, or download custom ROM. But not now! The procedure mentioned below will help you update your Nexus 4 device in a much easier and inexpensive manner. The procedure will comprise of following steps and they will be elaborated below;
- Know the Version & Build Number of Your Nexus
- Requirements Prior Nexus Update
- Steps to Put Nexus 4 in FastBoot Mode
- Run Command Prompt
Know the Version & Build Number of Your Nexus
Many of users are unaware of which android version they are using. To make sure what version you are using there is a quick method which can be followed by Nexus users or any other Google Play edition device users.
- Go to “Settings” menu of your device (icon can vary).
- Here you will find “System” settings.
- Go to “About phone” or “About tablet>Android version”.
- The number which is shown is the device’s android version number.
- You will also see “Build Number” there. Note it down.
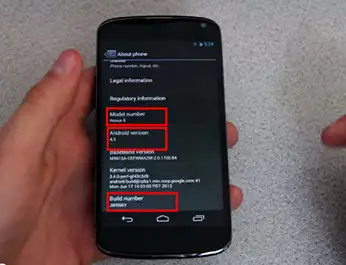
In case this number is 4.3, you really need to update it to take benefits of latest available android versions.
Requirements Prior Nexus Update:
Following files are needed to update to Android 4.4 KitKat;
- Download Android SDK Tools from Google Developers.
- OTA upgrade file for your device Nexus 4. The build number will help you get the correct OTA file.
- A PC to perform the update operation is highly required for this update process.
In order to place important files for further procedure, you can follow the below-mentioned steps;
- Create a folder in C Drive for example “Nexus Update” and save the OTA file for easy rooting from command line. So the path of folder becomes C:\Nexus Update.
- Install the Android DKS Tools>> Open Android SDK Manager and select following items for download.
- Android SDK Platform-tools
- Google USB Driver
-
- adb.exe
- AdbWinApi.dll
- AdbWinUsbApi.dll
- Change the (long) name of OTA file to OTA.zip for sake of easy cmd processing.Look for the folder where the “Android SDK Platform-tools” is installed. And copy the below-mentioned files to the “Nexus Update” folder which was created before.
- Steps to Put Nexus 4 in FastBoot Mode
In order to install the drivers you will have to put the Nexus 4 in FastBoot Mode. To do so follow up the process:
- Switch of the device.
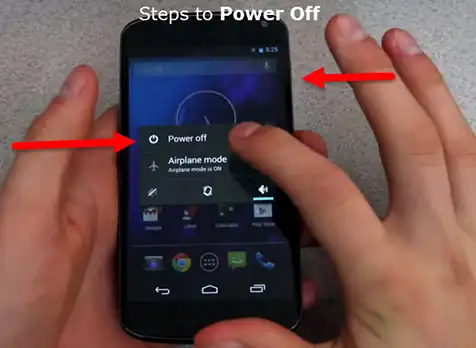
- Press Volume Up + Volume Down + Power Button simultaneously (The process of FastBooting depends on the device)
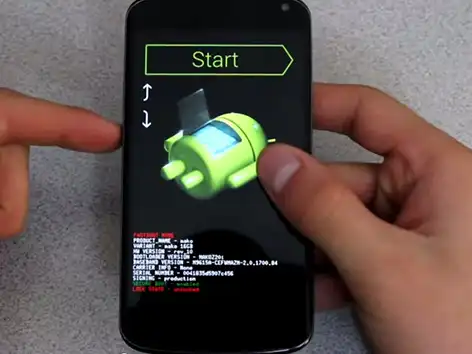
- Go to Recovery mode by pressing Volume Down twice.
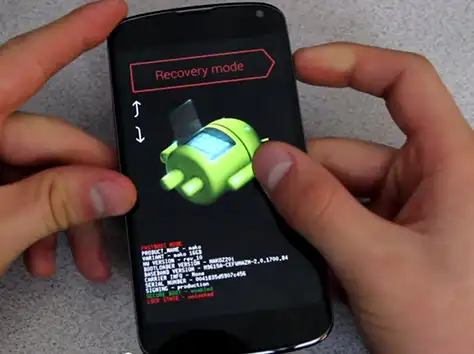
- Now press Power Button + Volume up to display this Menu.
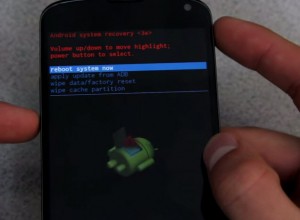
- Press Volume Down to navigate to “apply update from ADB”.
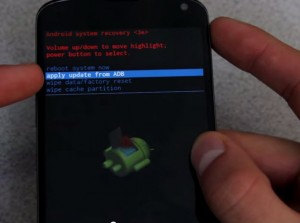
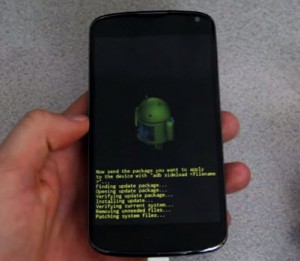
- And then press Power button. Following message will appear in your Nexus 4 display.

- Now connect your device to the PC on which you saved the drivers and necessary files.

Run Command Prompt:
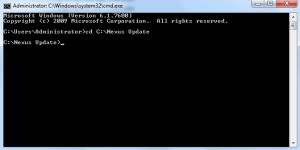
- Now open the command prompt on PC connected to Nexus 4 by typing cmd on Start Menu. Double click the cmd.exe and command prompt will open up.
- Type on command prompt: cd C:\Nexus Update
- This command will show the current folder as C:\Nexus Update> on which further operations has to be done.
- Now type: adb sideload OTA.zip
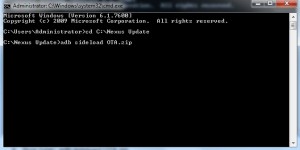
- The update will be done on your Nexus 4 as below. It is suggested to not disturb the process and switch off the phone once it is done;
Conclusion:
Process is very simple and can be used by any user. It is highly recommended not to switch off or stop the process in between the update process as it can harm the updates done. Switch off the Nexus 4 device for some time and then switch it on. Now you can successfully check the updated Android version of device.


