A Guide To Create Rules in Outlook Profile
At present every 7 out of 10 organizations; big or small, is ruled by Microsoft Outlook as being one of the most preferred choices for communication. But what sets a well-organized organization apart from the rest of the world’s Outlook users is the skill of ‘ruling it’ and not ‘being ruled’ by it. The messaging platform comes with a facility named Rules in Outlook using which one can easily regularize exchanged emails in the specified folder as per their wish and convenience.
The ‘How-To’ Guide
NOTE: This action will enable you to set up a rule that specifically stores emails in a designated folder or moves them to a corresponding folder if they contain the specified word.
Applicable For: Microsoft Outlook versions 2003, 2007, 2010, as well as 2013.
Create Rules: Section 1
To make a Rule, launch the Outlook first and view emails.
For Outlook 2003 and 2007 Users
- Go to Menu, click on Tools, and select ‘Rules and Alerts’.
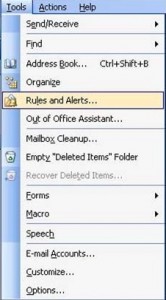
- Click on ‘New Rule’

Once done, proceed to Step 3.
For Outlook 2010 And 2013 Users
- Click on File tab and select ‘Manage Rules and Alerts’.

- Click ‘New Rule’

Creating Rules: Section 2
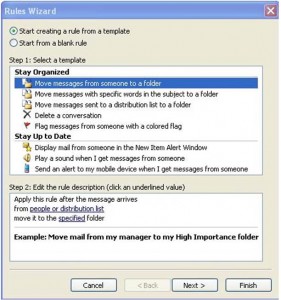
- You will see a Rules Wizard now. You can either use a generic template or a blank rule to create a Rule. To create a rule for placing emails from a specific user into a particular folder, select the first template listed under the “Stay Organized” column, then click on “Next”. This will explain the procedure when using a template.
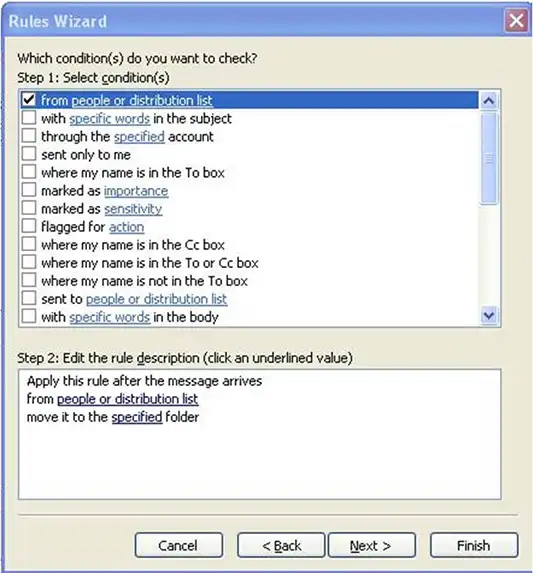
- From Section 1, choose the desired conditions that match your rule by clicking on their respective checkboxes. Here select the underlined terms to set conditions that were specified in Section 1.
Creating Rules in Outlook: Section 3
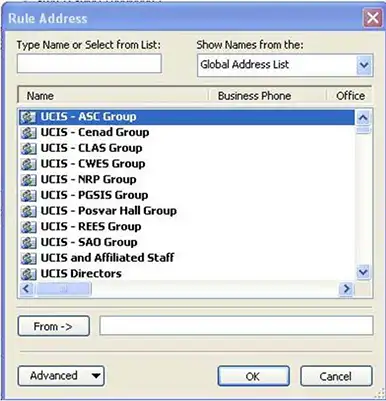
- When you proceed after selecting underlined words in Step 2, a new window opens up giving you the option to specify conditions.
NOTE: If a person or distribution list has been clicked on, you need to choose the same from Global Address List or account Contact list.
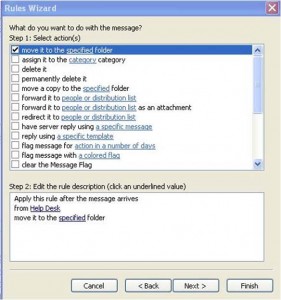
- Choose the action for your rule which includes; moving a message to the folder, deleting a message, or forwarding a message to another recipient. Check the box for all the actions that you will apply to your rule, which is currently being created. Within step 2, click on the underlined word and choose a value that is appropriate for your rule. If you’re moving messages into a folder, select a folder name from the given list or create a new folder. Click ‘Next’ once you’ve selected the actions.”
Read more: To Know New Outlook.com Design.
Constructing Rules in Outlook: Section 4
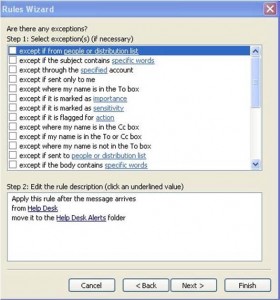
7. Apply exceptions to the rule if needed.
NOTE: You might want to transfer all mails from Folder1 to Folder2 with an exception for the mails that have been flagged important. Click on Next once exceptions have been selected.
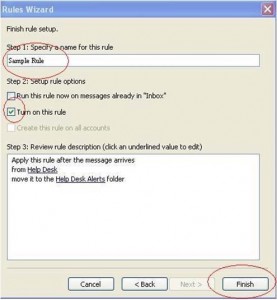
8. Give a name to the rules in Outlook, turn it on, and then review description of the rule. Click on Finish to save newly created rule.
