How to Compress OR Zip Files & Folders
Benefits Of Compressing File (s) and Folder (s)
Storage Space: The space provided in hard disk comes at a cost. Compression of file (s) and folder (s) allows reducing the file size to half of its original size.
Easy Sharing: An email (for example in Gmail) has restriction of attaching a file less then 25MB size. Compressed files can be shared through emails, chat-box, removable storage device etc.
Reduce Downloading Charge: ISP service providers charge for amount of data that is downloaded. If a zip file is downloaded, the size of overall data will be half its original size which means reduction in downloading charges.
So if you share something online, its chances of being downloaded increases because its size is small.
Let’s Get Started with Compression Process!
Method-1) Default Compression Option in Windows
In Windows XP and versions above it, Microsoft has integrated the option to compress files and folders.
Select the file or folder that you want to compress. Right-click on it and drop down to ‘Send To’ and chose ‘Compressed (Zipped) Folder’


If required, the compressed folder can be re-named.
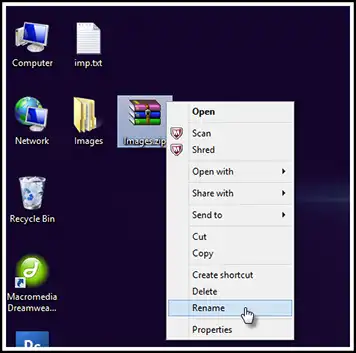
Method-2) Archive Files & Folders Using 7-ZIP (FREE)
7-Zip is a free application used to compress PST file. It creates 7z format archives with a .7z file extension.
Step1) Visit www.7-zip.org/. Download the application and install it.
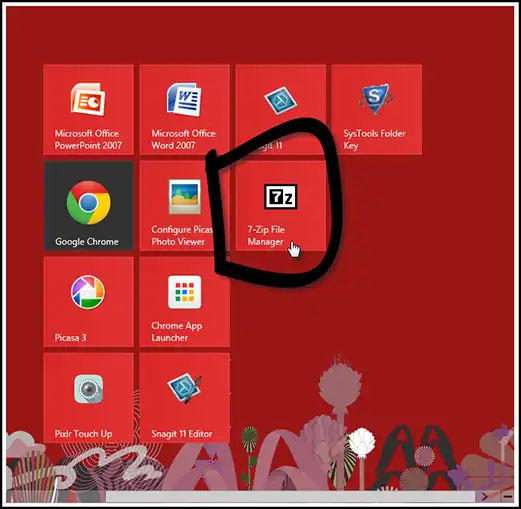
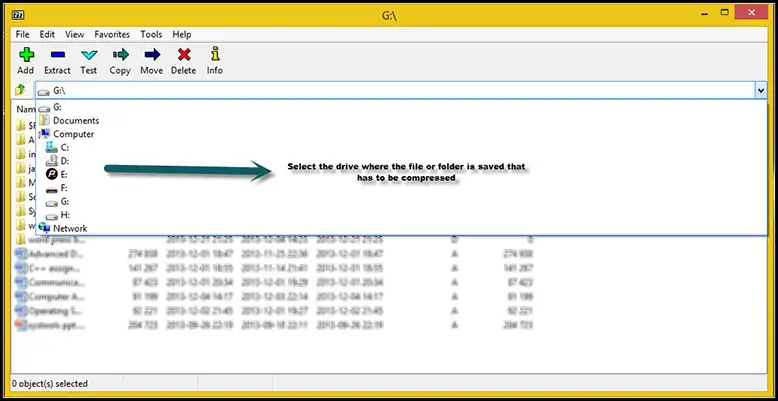
Step2) Use the drop-down menu to select the drive where the file or folder to be compressed is saved.
Step3) Chose the file/folder to be compressed. Right click on it, select ‘7-Zip’ and select ‘Add to Archive’
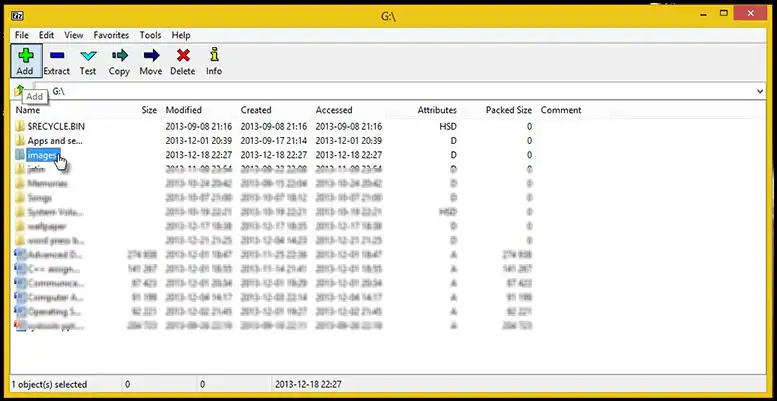
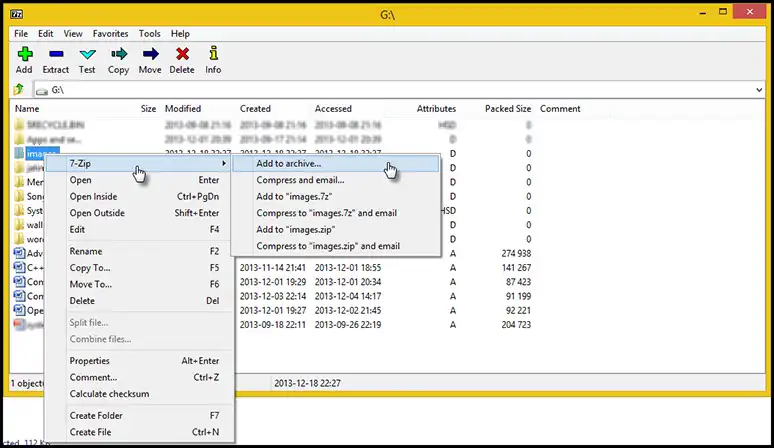
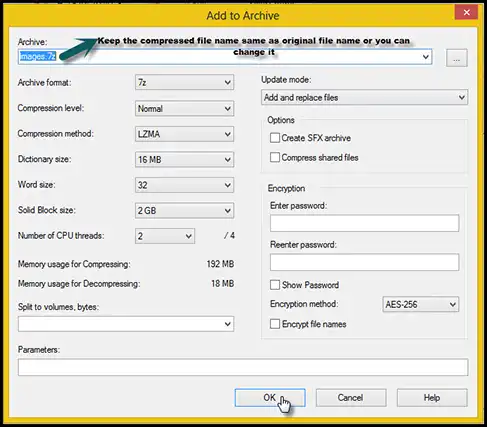
Step4) An ‘Add to Archive’ window will pop up. This will allow to rename the compressed folder or you can save reultant with the original name of file/folder and click OK.
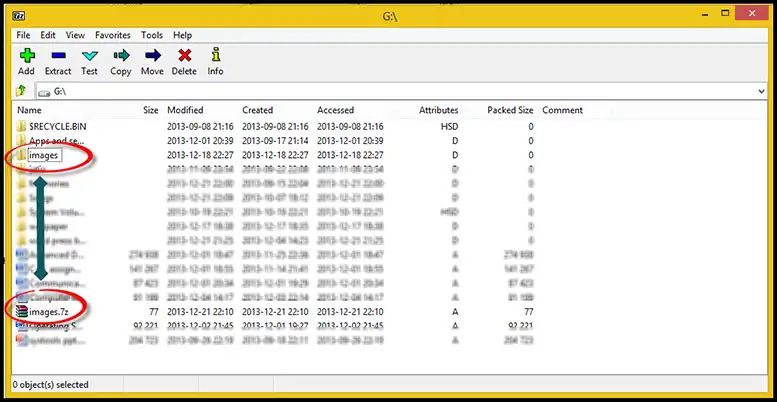
Method-3) Compress Files and Folders Using WinRAR (FREE)
WinRAR is a shareware data compression and archive utility. It creates create archives in the .ZIP format.
Step1) Visit http://www.win-rar.com/download.html?&L=0. Download and Install it in system.
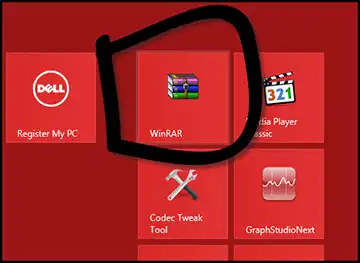
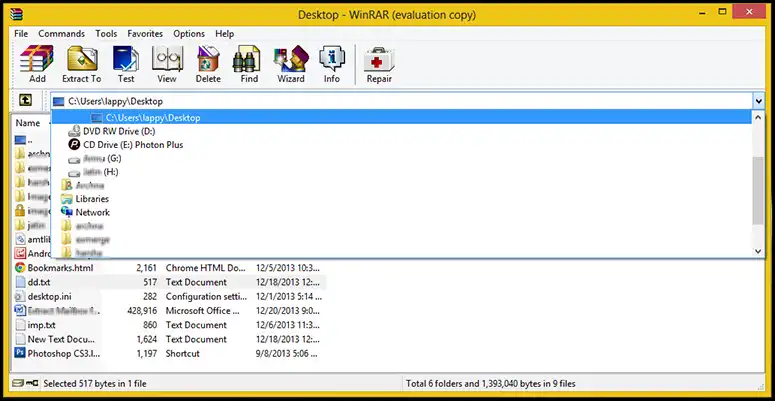
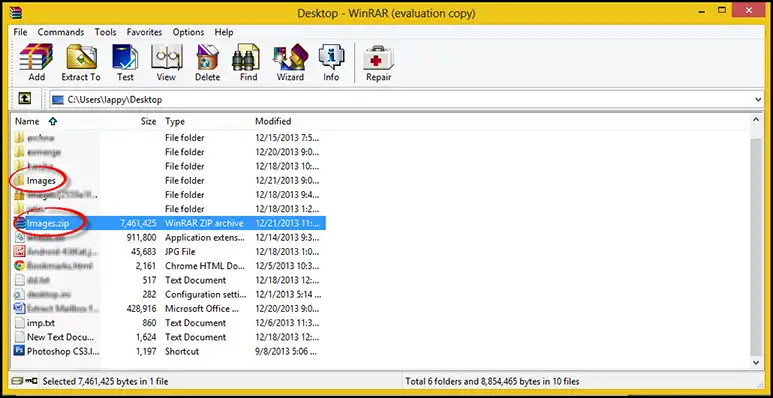
Step2) Use the drop down menu to select the drive where the file/folder to be compressed is stored.
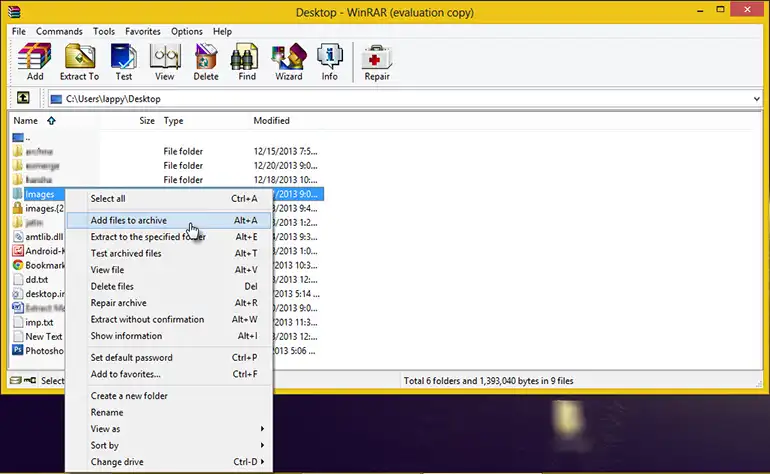
Step3) Select the folder and drop down to ‘Add Files to Archive’ option
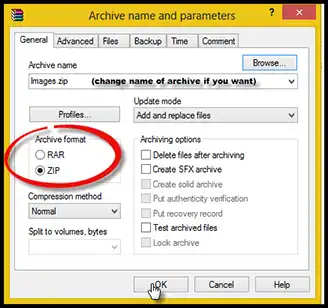
Step4) In the ‘Archive name and parameters’ window, you can change the name of archive file if you want. Also, the archive format can be selected from the available choices: ‘RAR’ or ‘ZIP’
Unable to Extract Zip File? Here is a Suggestion!
Zip file creation and extraction is absolutely simple. However, there are situations where you download or receive zip file from third party source and you are unable to extract it. To handle such scenarios, download Zip Repair software that extracts data from Zip file even if it is corrupt or in non-extractable mode.

