

The Windows Registry can be defined as a database carrying a complete set of configuration settings which reflects the behavior of Windows. It is an essential database as it also carries the information of location of program files, your short-cuts, and the pointers; everything is stored here in the registry. The settings for the software programs you install, user preferences, hardware devices settings, OS configuration, etc is also stored here. In fact it might not be wrong to say that everything you do in your system is recorded here including the myriad of links you have opened. This clearly follows up to a situation where the registries are full of un-wanted entries.
In What Situation You Must Clear Registry?
Entries of old and unwanted Registry hardly affect the system but in some cases it has been observed that when these registries grow in size it slows down the system. And that is why many experts suggest cleaning it up. This is not the only reason why one might need to clean up registry. When you uninstall any program from your system through Add/Remove feature, its files are still stored in the registry of your Windows 7 system. In case you want to completely get rid of such programs, you have to essentially delete it from the registry also. So, as a troubleshooting step also you might need to delete registry key from this Windows Registry. It can be done following the below mentioned procedure which has been divided into two sections as;
- Steps to Backup Windows 7 Registry
- Steps to Delete Unwanted Registry
Steps to Backup Windows 7 Registry
Registry of your system is very important and any mistake can ruin your system settings. Hence it is highly recommended to create its backup and save the original settings before you perform any editing in the Registry.
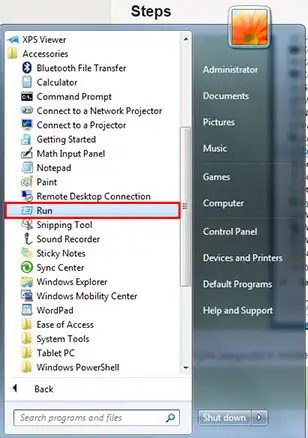
Step 1: Go to the Start menu and type Run. Or go to Accessories from the Menu and search for Run option and click it.
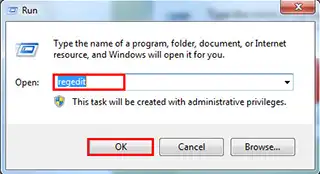
Step 2: A small pop-up will open up like below. Type “regedit” (without quotes) in the text box and click OK.
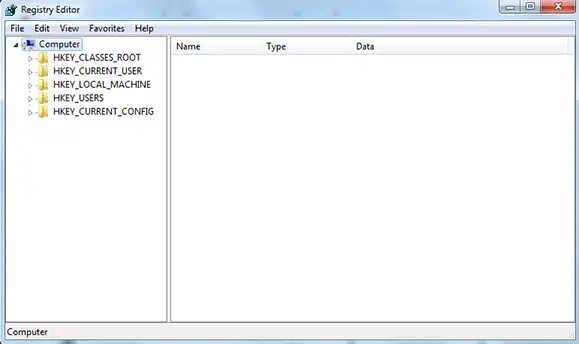
Step 3: Another window i.e. Registry Editor Window will open up through this command. In order to safeguard this registry information it has to be exported to some other location.
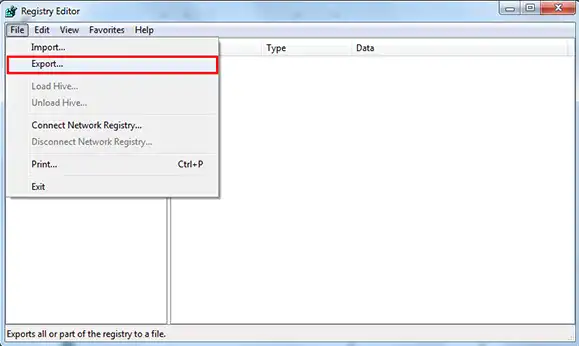
Step 4: Go to File option. Here click on Export.
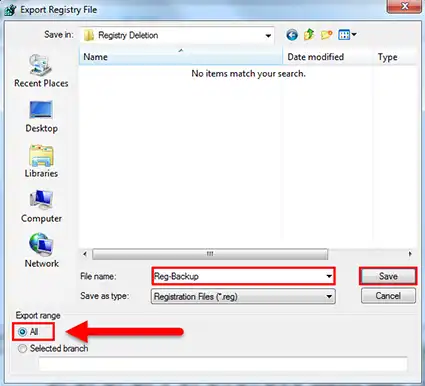
Step 5: Here you can provide the location where a copy of your registry will be saved on same system.
- Provide a File Name, as here I have provided Reg-Backup.
- Provide location, you can also create a new folder here.
- Select ALL so as to create backup for all the registries.
- After performing all these steps, click Save.
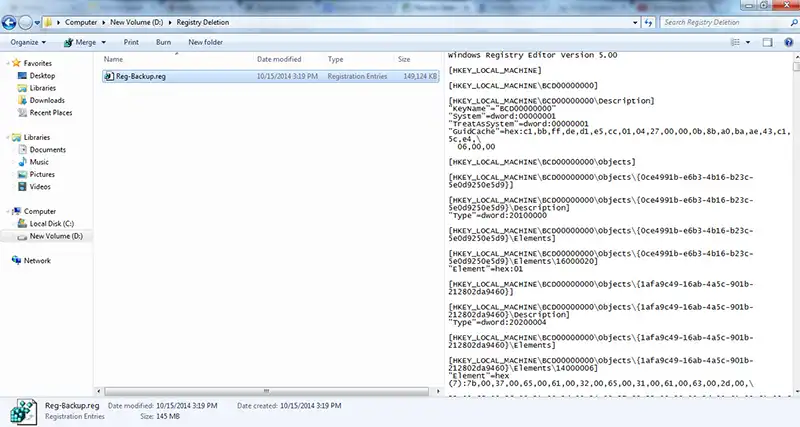
Step 6: The copy of registry will appear like below mentioned image.
Steps to Delete Unwanted Registry
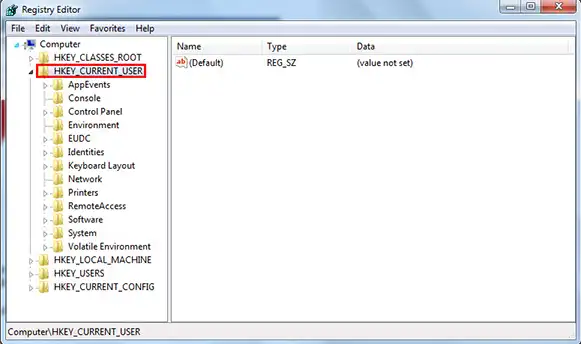
Step 1: The hierarchy can be seen in the left pane. Select the HKEY_CURRENT_USER and expand this option.
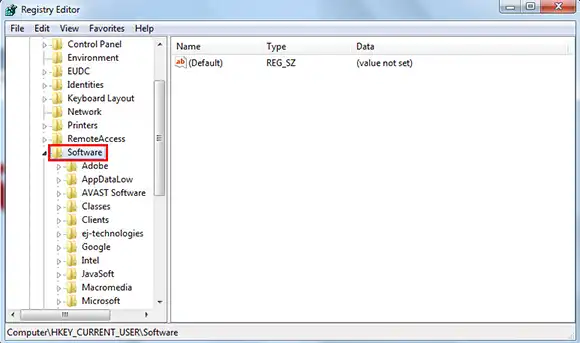
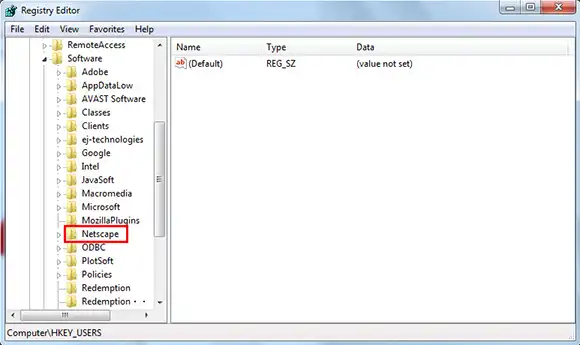
Step 2: Here select the Software option and expand it further.
Step 3: Now here select the software whose key you want to delete. In case you are not finding it, you can also press CTRL+F to open the Find tab where you can search it by entering software name. For e.g. here I want to delete the Netscape key.
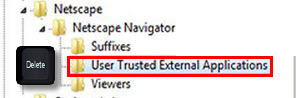
Step 4: When you click on the software and expand it more you will be able to view the files related to that software from which you can delete the Key. Highlight the key and then press Delete.
Steps to Clean the Unwanted Start-up Items
Some popular applications like Quicktime Player, Real Player etc. install registry value in order to load an updator when Windows starts. In case you want to delete these follow the below mentioned steps;
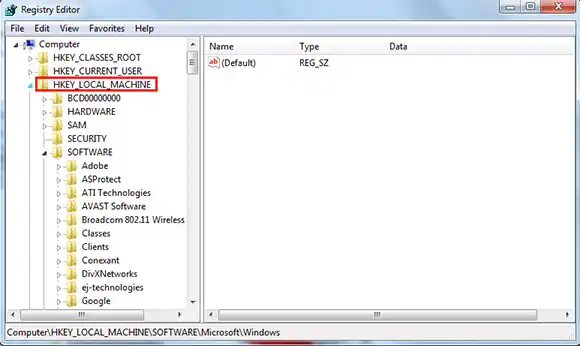
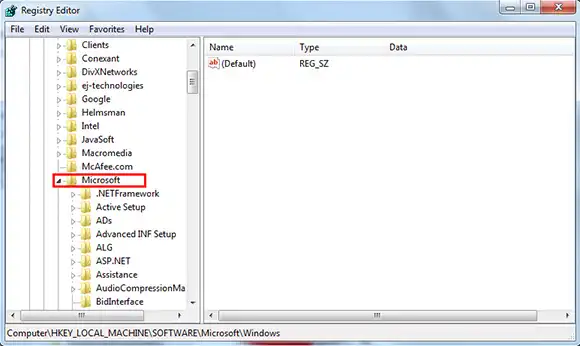
Step 1: Open the Registry Editor and go to HKEY_LOCAL_MACHINE and expand it.
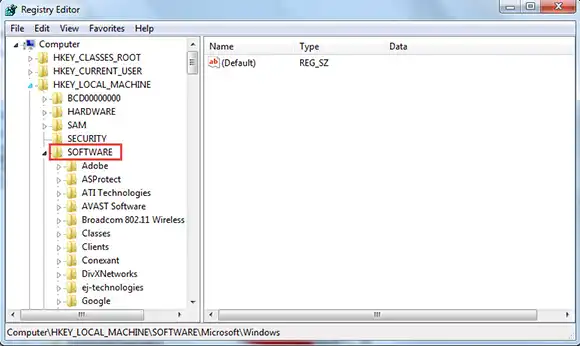
Step 2: Here choose the SOFTWARE option and expand it further.
Step 3: Now Go to Microsoft and expand it.
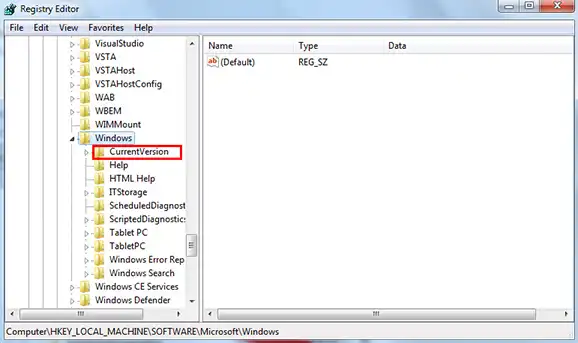
Step 4: Select Windows and expand it and select CurrentVersion and expand it further.
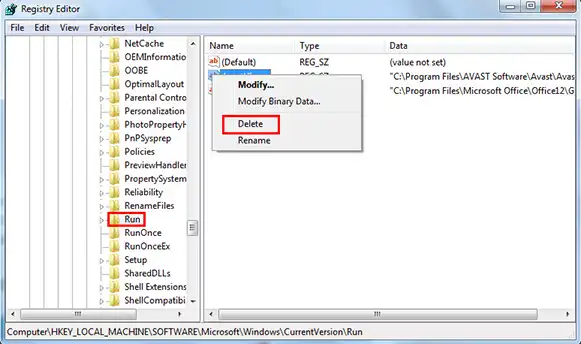
Step 5: Now select Run and view the right pane where all the short cuts for the executable files will be listed. Choose the program short cut you want to delete, right-click it and then click on Delete.
Conclusion
:
The step wise procedure of cleaning Registry is described in the blog. It is important to take care of the fact that no harm should be done to the hierarchy of the registry. In fact, any glitch can turn up to be big blunder and hence a backup is essential before you perform any changes or deletion.


