

If you are going to use IIS management console for configuring DNS Server on your Windows computer then, it is not a good practice. Better to adopt an easy to understand and follow procedure to settle local DNS Server on your computer. The underneath given pictorial method will let you know how to set local DNS Server on Windows 7 within few seconds.
Follow The Steps Listed Below
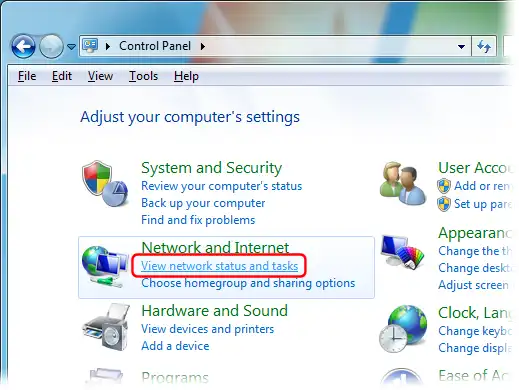
- Network and Internet ->Windows Control Panel -> View network status and tasks
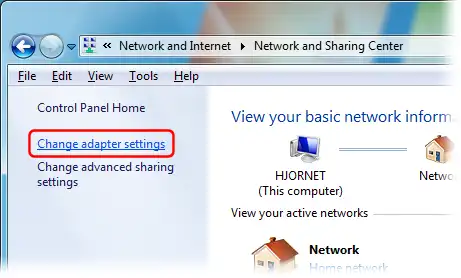
- Move ahead with Change Adopter Settings
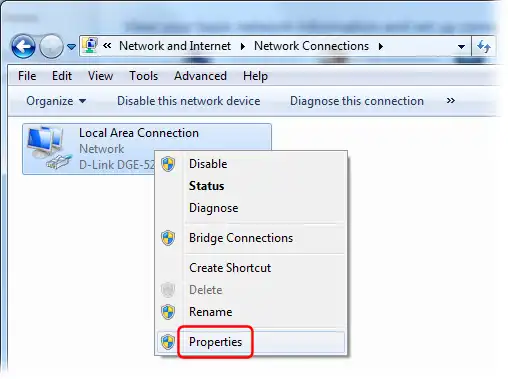
- Need to make right click on Internet Connection tab will explore a list of actions, you have to click on Properties
- After configuring the recent Adopter setting -> Under ‘This Connection uses the following items’, you need to click on Internet Protocol Version 4-> The next action you will have to perform is moving ahead with “Properties” tab

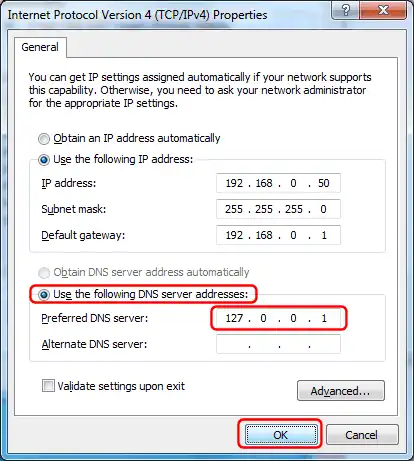
- The new windows TCP/IP4 will come across to you, two options you will see there, first is “Obtain an IP Address automatically” and second is “Use the following IP Address”, select the second option and fill the crucial credentials, within the same Window select Radio Button (Use the following DNS Server Settings)
Click on ‘OK’ tab to save the settings you have made to set up the local DNS in your Windows 7 system
The DNS Server IP Address should match with the inbound request of DNS running in your system. Or you can say simple DNS plus settings of your computer should have connectivity with DNS.
You should always use the IP address that is easily accessible over the local area network, otherwise you can easily move on with 127.0.0.1as a local host address when your Windows 7 computer is configured with 127.0.0.1.