

Recovery Options Using Ubuntu Live CD
Many of you might not know that deleted data is recoverable; this can be done using various available utilities used to recover deleted files. The only condition to perform such action is your machine must be in bootable position. But what if it is not? What if your whole system drive has been formatted or you are unable to boot your machine? This blog highlights some of the keen methods to allow you hunt upon most critically deleted files. It can also help you to fetch back whole partition. Four methods or we can say utilities will be discussed in brief to recover data from drives formatted for various platforms like Linux, Windows, or Mac computer.
Tip: These methods should be used as soon as you realize that data has been deleted as the output is likely to be positive when done before time has gone. This is because tool will work only when the data has not been overwritten on a hard disk.
Analytic Setup
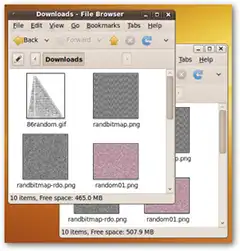
To show performance of these tools we will use a small 1 GB hard drive. Half partition will be ext2 (Linux based file system) and another half will be FAT32 (Windows based file system). 10 random images will be stored on each drive.
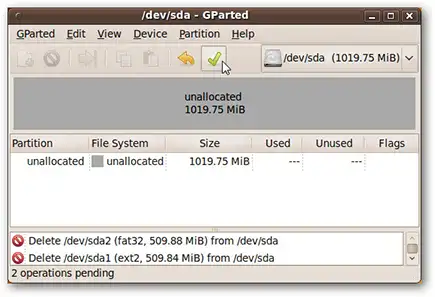
We then erased the data from partition table by simply deleting the partitions in GParted.
Data is unavailable and cannot be searched either. Now we have to find out if it cannot be regained at all. Or is it lost forever?
Settings To Be Done Prior Installing Tools
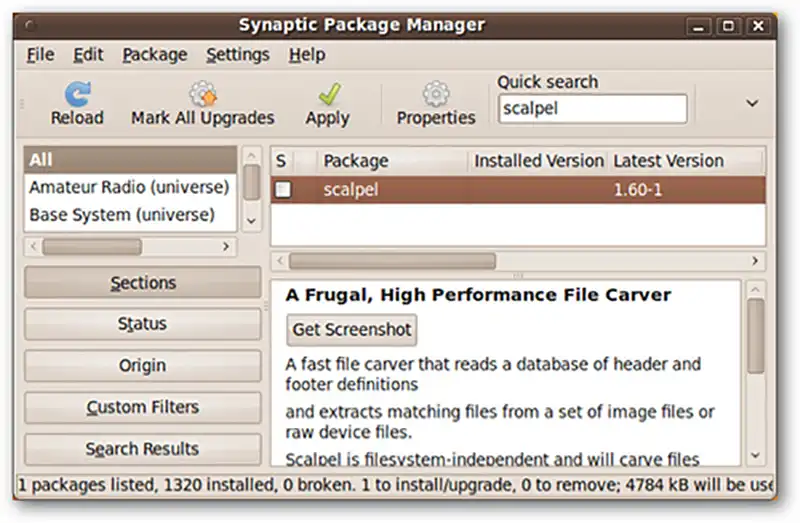
There are multiple tools available for Ubuntu users and many of these are stored as archives well known as repositories. These make easy to install new programs securely and hence its settings has to be changed. The tools we are going to experiment on are in Ubuntu’s universe repository.
Enable Repository:
- Go to System (top left) > Open Synaptic Package Manager>Administration > Synaptic Package Manager
- Click on Settings > Repositories and add a check in the box labeled “Community-maintained Open Source software (universe)”
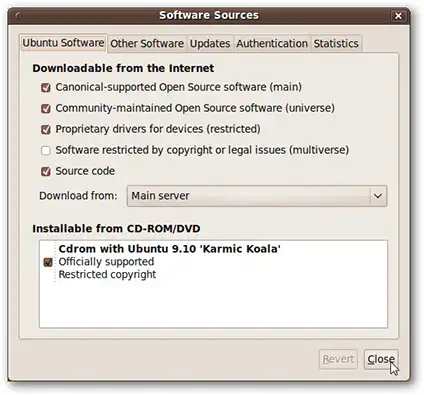
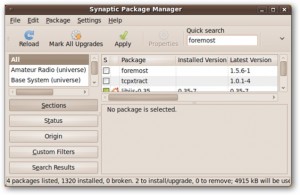
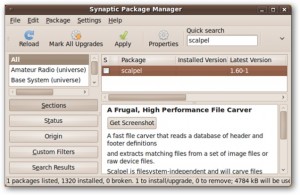
- Now click Close, and then in the main Synaptic Package Manager window, click Reload button. Once package list has been reloaded and search index rebuilt search for and mark for installation one or all of the packages namely; testdisk, foremost, and scalpel.
Tools For Recovery
- Testdisk includes TestDisk and it is capable to recover lost partitions and also repair boot sectors.

- PhotoRec recovers different types of files from various file systems.
- Foremost recovers files on the basis of files’ headers and many other internal structural details. Mainly operated on hard drives or drive image files and was developed with purpose of Special Investigation cases by US Ai Force Office.
- Scalpel is almost same as Foremost but has some advance techniques and utilizes lower memory. In case you have older machine with very less RAM memory then this tool is for you.
TestDisk Analysis to Recover Partition
Partition table of hard drive corruption can be recognized from the fact if you are unable to mount your drive. So let’s perform data recovery by recovering partitions on drive and fetching all files;
- Initiate Testdisk tool and open terminal following path (Applications > Accessories > Terminal).
- Type in sudo testdisk
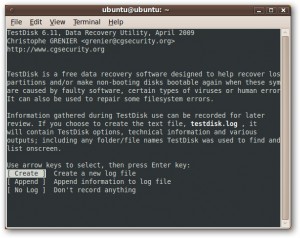
- If you want you can also create log file. Your machine will soon display list of storage media. You can identify drive from its size and label.
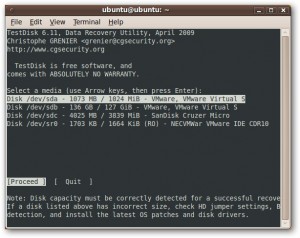
- Here software will ask to choose the partition table type. Select Intel for most of the cases like ext2/3, FAT32, NTFS, etc and press Enter.

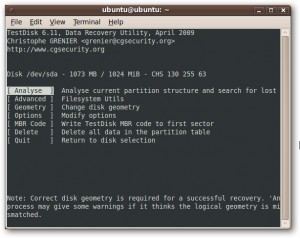
- Now highlight Analyze and Enter.
- Our small hard drive partition which was formatted as NTFS is found with this software but it is unable to recover it.
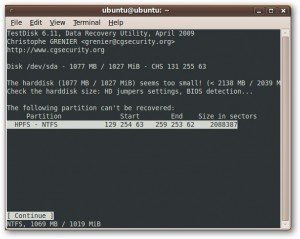
- It also finds two partitions which were previously deleted by us. Select the partition and press Enter.
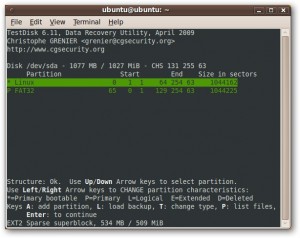
- In worst case if TestDisk is unable to find all of your partitions then you can dig it deeper with Left and Right Arrow keys. Our partitions were found so we will continue with selecting Write and pressing Enter.
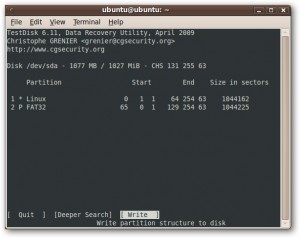
- Software displays message that you will have to Reboot.

Warning: In case your Ubuntu Live CD is not persistent, the after you rebbot you will lose any tools installed earlier and will have to re-install it.
And you are completely done with your data recovery as we can see the files which were deleted from the partitioned which are now visible.
PhotoRec Analysis to Recover Files of Certain Types
Now we will try to recover files using PhotoRec. We have already deleted 10 images from both partitions and reformatted them. In spite of being console based program, this software happens to be most user-friendly.
- Initiate the process open terminal (Applications > Accessories > Terminal).
- Give command line as sudo photorec.
- You are asked to select a storage device to search. Again be smart enough to recognize correct device through its size and label. And hit Enter.
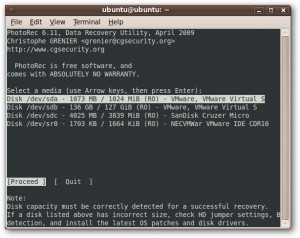
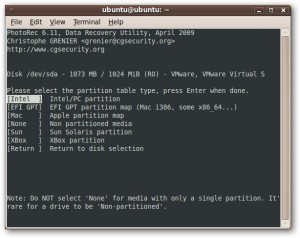
- PhotoRec will now display various types of partitions and asks you to choose. You can choose Intel for most of the file system ext2/3, NTFS, FAT, etc and hit Enter.
- Now a list of partitions will be displayed. In case you want to recover all type of files then select Search and enter. But since this process will take too much of time and this case we need to search for only one type of file i.e. picture file. So we will opt for Right Arrow key and select File Opt. Now press Enter.
- Here you get list of file types which can be recovered PhotoRec. You can clear all the unwanted one by simply pressing “s” and then find the apt one, in this case it is – jpg, gif, and png and select them by pressing Right Arrow Key. This will save your time.
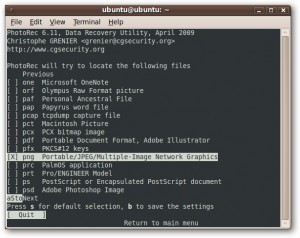
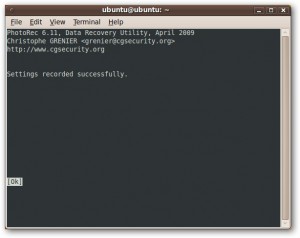
- Now press “b” so as to save the selections made of image file types.
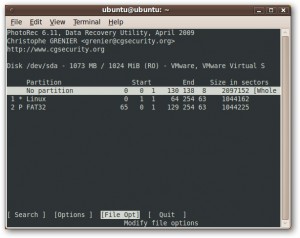
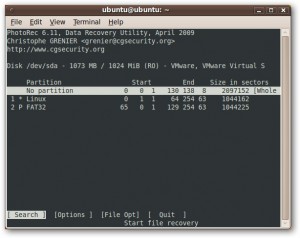
- Press Enter to “Return to Main Menu” to go back to the list of partitions. As both the partitions is supposed to be searched we highlight “No Partition” and “Search”. Now hit Enter.
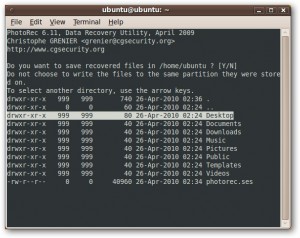
- Tool will prompt for a location so as to store the recovered files. Here we will save the files on the Ubuntu Live CD’s desktop.
Tip: This is done at experimental basis and we are not recovering very much, but when you perform this task it is recommended to store the recovered files to another healthy hard dive. Avoid recovering files to same hard drive.
- PhotoRec tool successfully recovers 20 pictures from the partitions on same hard drive.
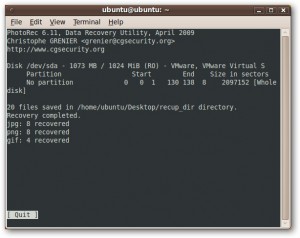
- You can also check it in the recup_dir.1 directory created by it confirms that recovery of all the pictures has been done.
Foremost Analysis for Files Recovery
Unfortunately Foremost is not that foremost when it comes to the interface. But it offers huge number of command line options and provides maximum output from your hard drive. To get full list of command-line options, go to (Applications>Accessories>Terminal) and then type in foremost –h;
For our analysis, the mostly used command line options are;
| -t | Display of comma separated list of types of files to search for. | We choose; “jpeg, png, gif” |
| -v | Enable Verbose-mode | Gives more info on what foremost is doing |
| -o | Output folder to store recovered files | We created a directory named “foremost” on desktop |
| -i | The input that will be searched for files | We use a hard disk, /dev/sda |
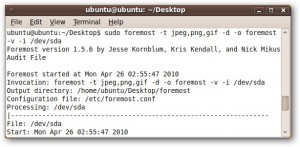
- For our case Foremost Invocation is;
sudo foremost –t jpeg,png,gif –o foremost –v –i /dev/sda
Note: The Invocation used for Foremost completely depends on what you want to recover and what are you searching for. So it can differ and using the list of command line options you can construct your invocation.
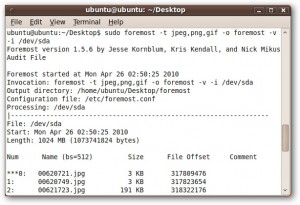
- Here we can clearly observe that Foremost is able to recover 17 of the 20 files stored on the hard drive.
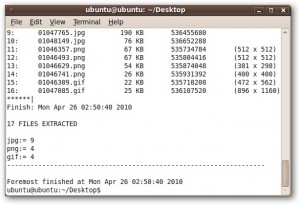
- We can see that files were recovered but for some files some errors occurred in the thumbnail for 00622449.jpg.
Note: This can be because of ext2 file system. It is recommended that for Linux file systems ext2 file Foremost should be used with the –d command-line option.
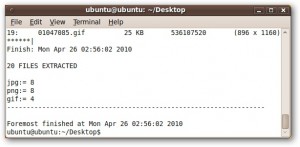
- Now we will try to run Foremost again using the –d command-line option to invocation:
sudo foremost –t jpeg,png,gif –d –o foremost –v –i /dev/sda
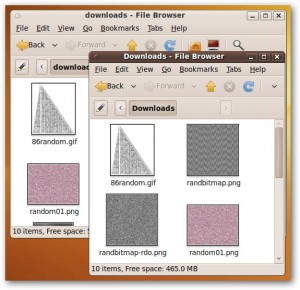
- Foremost successfully recovers all 20 deleted images!
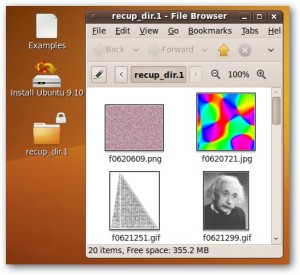
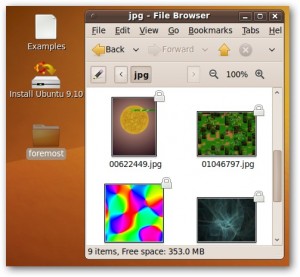
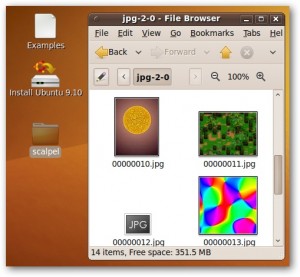
Have a look on all the recovered picture files.
Scalpel Analysis to Recover Deleted Files
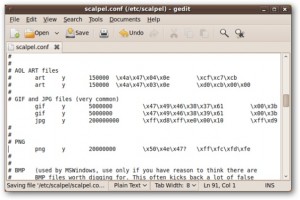
Scalpel is one more solution for data recovery and is highly configurable. But this software comes with a little twist; you will require editing configuration file before attempting data recovery.
You can use any text editor but we are using gedit for changing the configuration file.
- Go (Applications > Accessories > Terminal), type in;
sudo gedit /etc/scalpel/scalpel.conf

- scalpel.conf is comprised of information of different types of files. Simply remove the “#” character present in starting of those lines with file type to be recovered this is known as Uncommenting.
- Now save the file after changes done and close it. Go back to the terminal Window.
- Just like Foremost, this software also has numerous command-line options to help you; here we will define only the input device (/dev/sda) and output folder.
- The output folder is that folder which we created on the desktop named as “scalpel”.
- Invocation is;
sudo scalpel /dev/sda –o scalpel
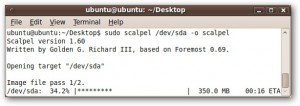
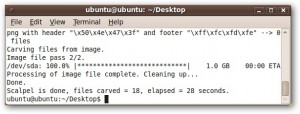
- Scalpel tool recovers 18 of 20 files.
- Here we can see the recovered files although there were some problems associated with (e.g. 00000012.jpg). The icon displayed shows that the files have some errors.
What is Outcome?
- TestDisk successfully recovered all the 20 files.
- PhotoRec also efficiently recovered all the files.
- Foremost showed some errors but with proper invocation we got accurate results.
- Scalpel almost recovered 90% and might have done 100% if we would have played some more with the command-line options.
The results are out and we can see that how the impossible task has been done in an easy manner. Wherever your files are saved these tools will surely hunt them and fetch them. But was it that easy for you? Remember the fact that here we recovered same type of files and at very low count, as the file types will increase command line invocation will also vary. Moreover many of you might not be able to handle this complicated command line methods. If you are familiar with it then go for it if not then you should consider some more user-friendly GUI software.


