

Exchange Server Administrative Rights are required in order to perform some of the large scale activities on the Server. The rights to perform these activities are only allotted to a Server administrator and not to any of the users in it.
Even for having access of the MS Exchange components you need to have Admin rights on the Server. These components help in performing some of the commonly executed tasks quickly like; mailbox or user management on the Server, assigning rights or permissions, etc.
Once you have Exchange Server Admin Rights you can allot access permissions to other users depending upon the requirement without having to consult the Server Administrator.
Before Beginning
Make sure, who you are granting administrative rights to because once they have been provided the latter can have access of other user mailboxes, perform admin level tasks, grant access permissions to other users.
Procedure To Grant Exchange Server Administrative Rights
About The Task: You will be guided on allotting Exchange Server Administrative Rights to a user on the most commonly used MS Exchange editions.
Follow the step by step procedure for your respective Exchange Server version.
Exchange Server 2003: Full Administrator Rights
- From the Start Menu click on All Programs and go to Microsoft Exchange followed by System Manager. This will open Microsoft Exchange Systems Manager.
- Click on Action from the menu bar given on top of the screen.
- Select Delegate Control from Actions menu.
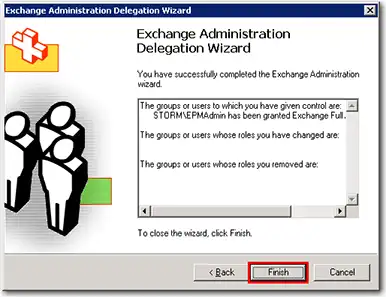
- Now Exchange Administration Delegation Wizard will open up. Click on Next.
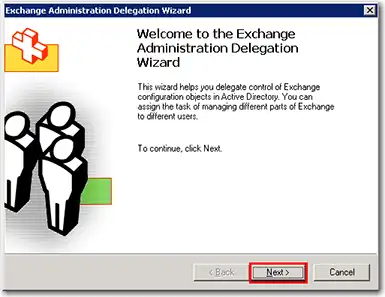
Administration Delegation Wizard
- On Users or Groups screen of the wizard click on Add.
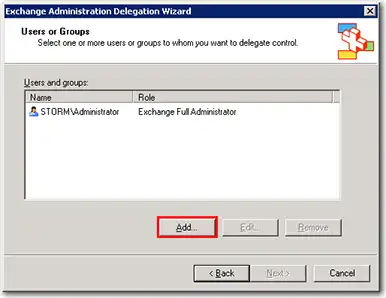
User Or Groups
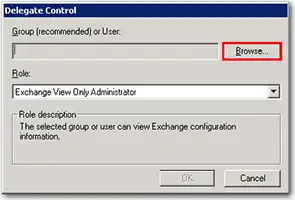
- In the window for Delegate Control click on Browse and choose the newly created user.
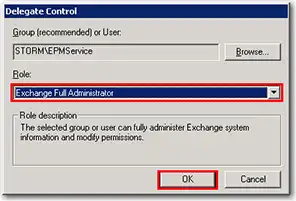
- Choose Exchange Full Administrator from Role list option and click on Ok.
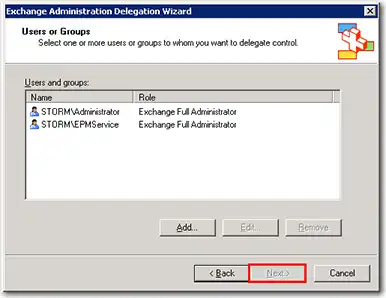
- Click on Next.
- Click on Finish to end the process.
Exchange Server 2007: Recipient Admin Rights
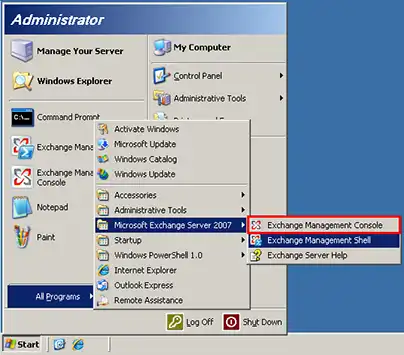
- Click on Start and go to All Programs. Select Microsoft Exchange Server 2007 and click open Exchange Management Console.
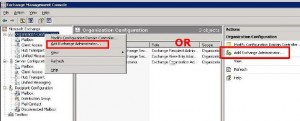
- Click on Organization Configuration from the Console tree given on the left pane of Management Console for Exchange.

- Right click on Organization Configuration and choose Add Exchange Administrator.
OR
Click on Action pane and select Add Exchange Administrator.
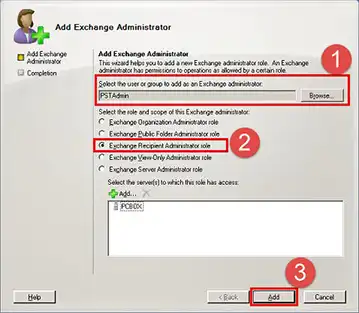
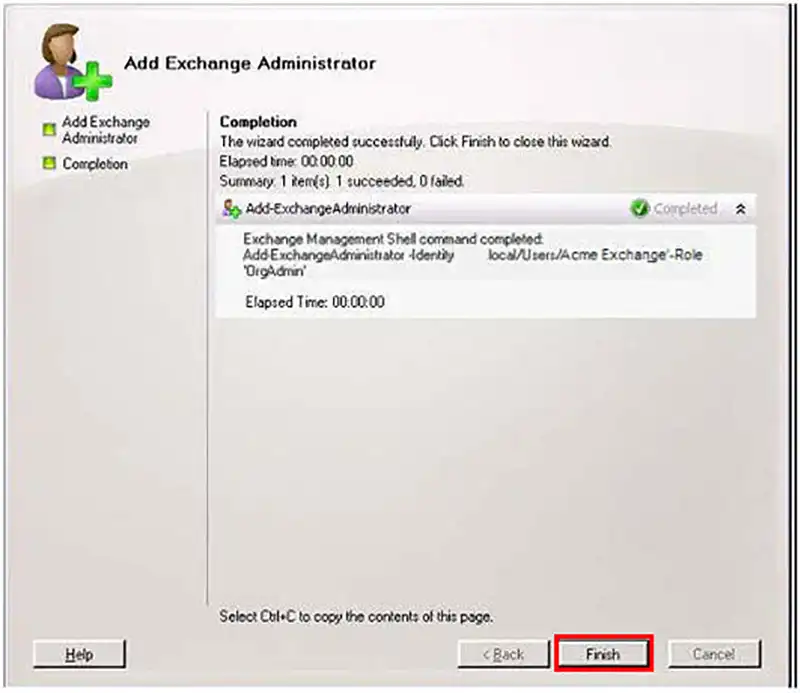
- On the Add Exchange Administrator wizard do the following:
- Click on Browse select the newly created user.
- Choose Exchange Recipient Administrator Role radio button.
- Click on Add to continue.
- When done, click on Finish button given on the Completion screen.
Exchange Server 2010: Recipient Admin Rights
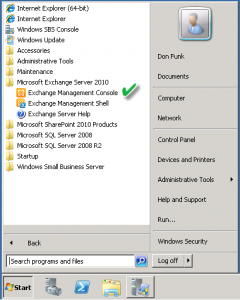
- Go to Start Menu click on All Program followed by Microsoft Exchange Server 2010. Choose Exchange Management Console and the respective window will open.
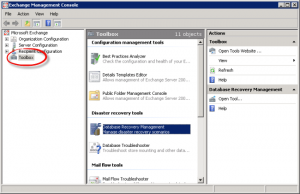
- Console tree window will have an option as Toolbox. Click on it.
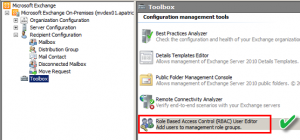
- Double-click on the Role Based Access Control (RBAC) User Editor tool from Work pane. Doing this will open Exchange Control Panel.
- Provide credentials of the user having account with the respective permissions required for opening User Editor within the Exchange Control Panel. Proceed by clicking on Sign in.
- Select the Roles and Auditing option and click on the tab for Administrator Roles.
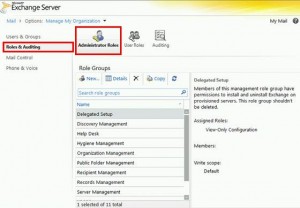
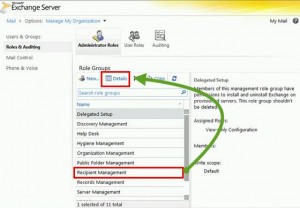
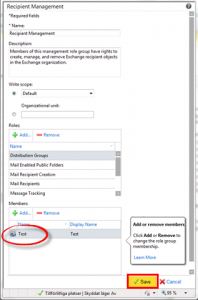
- From the Role Group list; choose Recipient Management followed by Details.
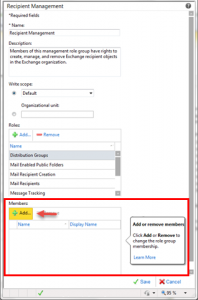
- Click on Add from the Members section.
- Choose the ‘user’ you would want to add in the respective Role Group and click on Ok.
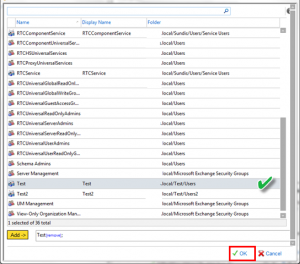
- Once the user is added to the Members list; click on Save to implement the changes made into Recipient Management Role Group.
When you are done with allotting yourself or any other user with Server Administrative Rights you can also with granting access permission of mailboxes to desired users. Assigning Full Access Permissions to mailboxes is one of the most demanded tasks by users which requires having Server Administrative Rights.
NOTE: Click Here to know how to allot mailbox access permission on Exchange 2002 or 2003.
Click Here to find out the procedure of assigning access permission of mailbox for Exchange version 2007 or 2010.


