Get Started With Outlook For Windows 8
When Microsoft introduced Office Suite 2013, the new version of Outlook was much anticipated. To some extent, the computing giant was successful in bringing something new to the email client which was worth appreciation.
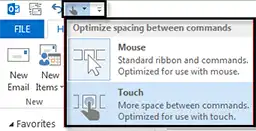
However, this new version bought good news for Windows 8 touchscreen laptops and tablet users. There is an option to switch from Mouse Mode to Touch Mode in Outlook 2013. On activation of the touch mode, the ribbons will become roomier which gives users better visibility and contact experience on screen. Along with this, some other factors made the new Outlook edition more exciting like:
- A soothing yet attractive interface with a new logo
- The weather bar with real-time forecast for easy scheduling
- Improved synchronization with SharePoint is a plus point
- Insertion of online pictures into email is made possible
- The attachment reminder that was missing in an earlier version
- The social connector to stay connected with Social Networking Site
Since Windows 8 and Outlook 2013, both are new in the market, some of the frequently asked questions online are answered here. Let’s get started!
Question 1) How to Configure Gmail With Outlook 2013?
This guideline will help you to access Gmail account data on multiple machines (using the IMAP). First of all, we will set Gmail to use IMAP (When a message is read using IMAP, it means it is not downloaded to a computer and is directly read from the Server).
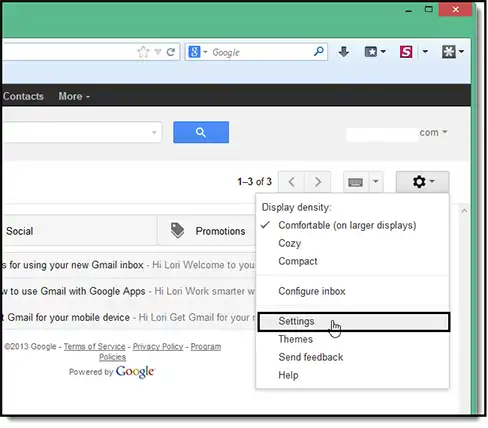
Step 1) Open a Gmail account that is to be synchronized with Outlook 2013. In the upper-right corner, use the drop-down menu to choose the ‘Settings’ option.
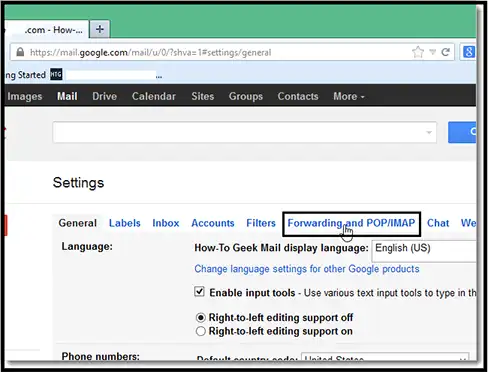
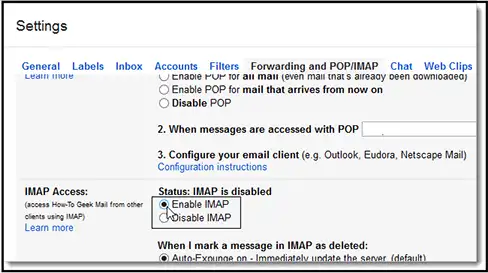
Step 2) Choose the option ‘Forwarding and POP/IMAP’
Step 3) Move down to the section ‘IMAP Access’ and choose the option ‘Enable IMAP’
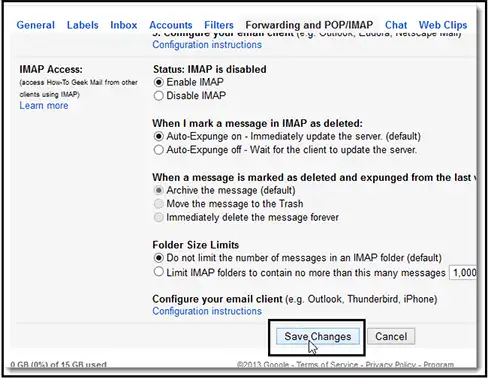
Step 4) At the bottom of the screen, click ‘Save Changes’ and then log out from your Gmail account.
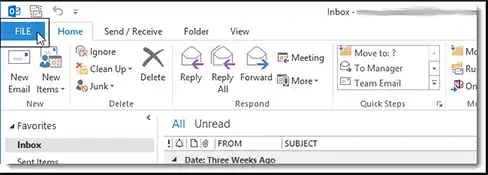
Step 5) Open MS Outlook 2013 and go to the ‘File’ menu to add a Gmail account
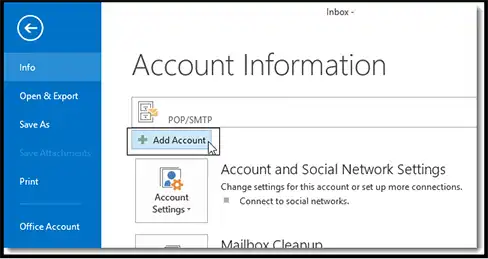
Step 6) Click on the ‘Add Account’ button
Step 7) A dialog box named ‘Add Account’ will pop up. Choose the radio button for ‘E-mail Account’ that will automatically synchronize Gmail with Outlook. In the text boxes, provide four credentials:
Your Name: Enter your name in the Text Box
E-mail Address: Enter your Gmail email address
Password: Type Gmail account password
Confirm Password: Enter the password again
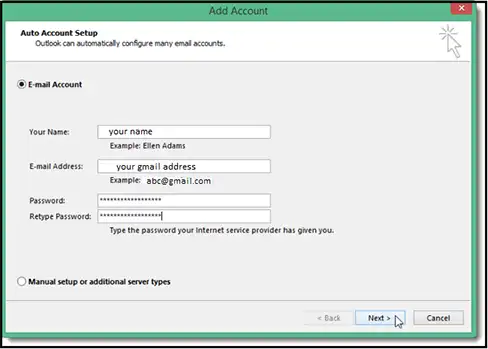
After entering the information, click ‘Next’ to continue
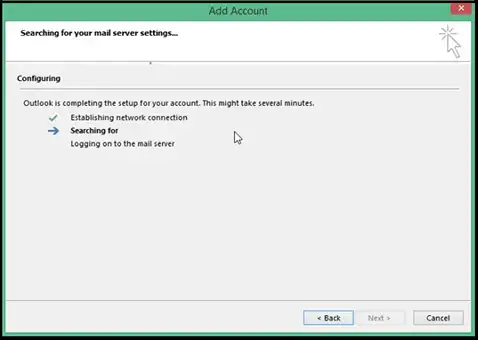
Step 8) The process of automatic Gmail and Outlook set up will be shown on screen. Meanwhile, it has to be noted that automatic set-up might work or might not work.
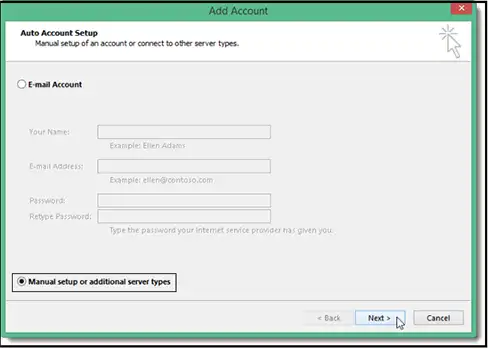
Step 9) In case the automatic process fails, then choose the radio button for ‘Manual Setup or Additional Server Type’. Click ‘Next’ to continue
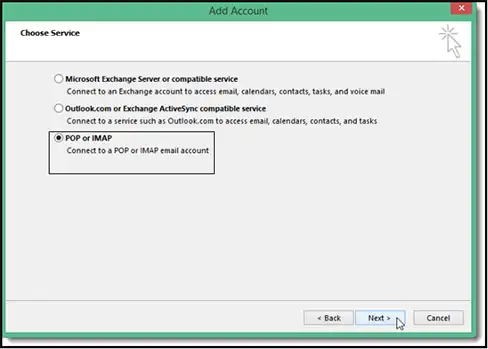
Step 10) A screen named ‘Choose Service’ will appear. Select the option ‘POP or IMAP’
Step 11) In ‘POP and IMAP Account Settings’, fill the required credentials:
Incoming Mail Server: imap.googlemail.com
Outgoing Mail Server (SMTP): smtp.googlemail.com
Note: In the Log-on information section, enter complete email address for ‘Username’
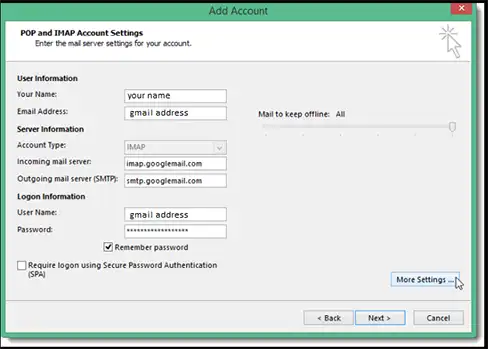
After filling required sections, click on ‘More Settings’
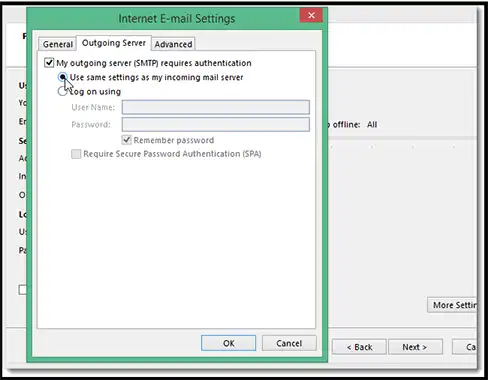
Step 12) An ‘Internet E-mail Settings’ dialog box will appear on the screen. Click on the tab ‘Outgoing Server’ to Enable the option ‘My outgoing server (SMTP) requires authentication’ and choose ‘Use same settings as my incoming mail server’.
Step 13) In the ‘Advanced Tab’, enter the credentials as highlighted in the image.
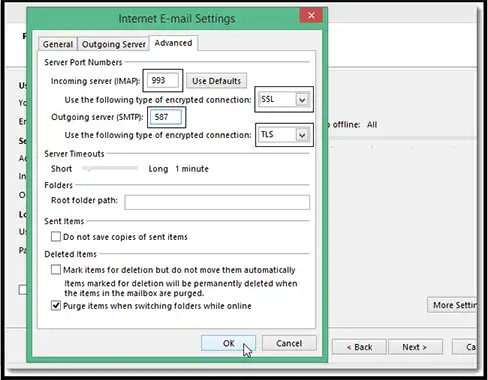

Important Point to Note: Select the Encrypted Connection for Outgoing Server first (SSL) and then enter the port number for Outgoing Server (SMTP). If the port number is entered before the encrypted connection, the port number will revert back to port 25.
After making changes, click OK.
Step 14) Click ‘Next’

Step 15) Outlook now login to Incoming Mail Server and sends a test mail message. When the testing process is finished, click Close.
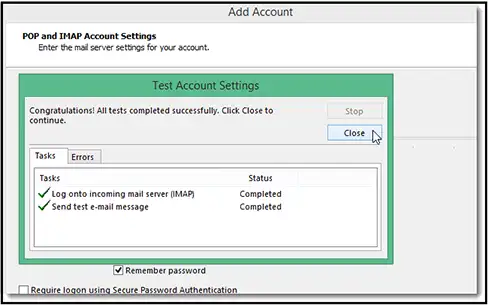
Step 16) When the process is finished, a screen saying ‘You’re all set!’ will appear. Click ‘Finish’
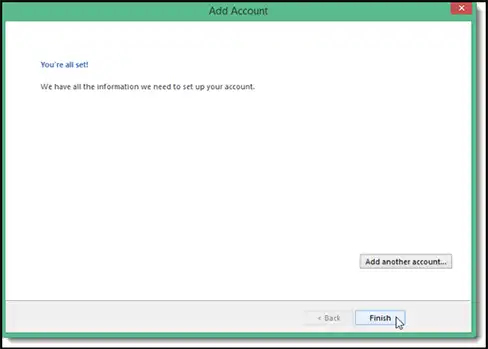
Any Changes made in Outlook mail folders will be reflected in Gmail account and vice versa
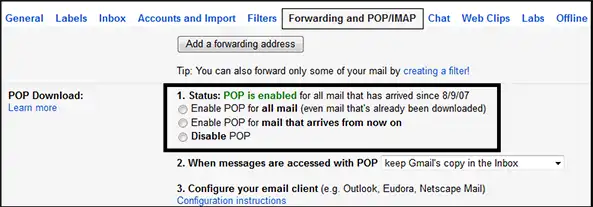
| Note: If you want to configure Outlook with POP3, then changes in step 3 and step11 has to be made.In step, ‘Enable POP3 for all mails’ (if you want all emails in your Gmail account to be downloaded to Outlook) OR ‘Enable POP3 for emails that arrive from now’ (if you want emails after configuration to arrive Outlook mailbox)
In step11, choose account type as ‘POP’ and the incoming mail Server as ‘[email protected]’
|
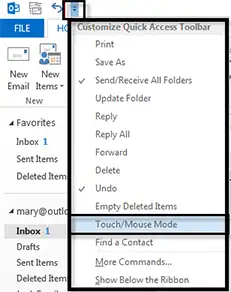
Question 2: How to Turn ON/OFF Touch Mode in Outlook 2013
Go to ‘Quick Access Toolbar Menu’ and select ‘Mouse or Touch Mode’
Question 3: Which versions of the Windows Operating System are suitable for Outlook 2013?
Installation of Outlook 2013 is possible only on Windows 8 or Windows 7 SP1. If it is to be installed on the Server, then the suited options are Windows Server 2008R2 SP1 (64 Bit) and Windows Server 2012 (64 Bit).
Do not try installing Outlook 2013 on Windows XP or Vista as these OS are not supported.
Question 4: Which version of Exchange Server works with Outlook 2013?
Exchange Server 2007, 2010 and 2013 are suitable for Outlook 2013. However, if mailboxes are hosted on earlier versions of Exchange Server, then mailboxes can be configured with an IMAP or POP account if possible.
Question 5: Are Windows 32/64 Bit and Outlook 32/64 Bit different things?
Yes, both are different. Outlook 2013 is available in 32 and 64-bit editions. The 32-bit edition of Outlook can be installed on 32 and 64-bit Windows but the 64-bit version of Outlook can be installed only on 64-bit Windows.


