Win7 Disc Burning Guide – Burn Files to CD
The introduction with pen drives and other easier modes of transferring data has resulted in making a number of users deprived from the simplest of procedures like burning a disc. Discs are still considered as one of the options to copy data to be used on computers, laptops, DVD’s, etc. So without making it any more complicated; here’s how you can burn a disc on Windows 7 with no software. Why use software when Windows Explorer can do it all!
Step 1
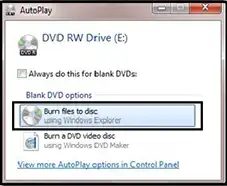
Insert a blank CD in the CD/DVD drive. Once an AutoPlay window for the disc appears; click Burn Files to Disc.
Step 2
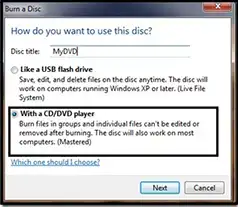
Next prompt will ask you for choosing between given two options. First is the Live File System option using which, you can save data like it is done on a pen drive. This means, not only can you save files on the disc but can also edit and delete them anytime later on. But compatibility on platforms other than, Win7, Vista and XP is not possible.
To get compatibility with other platforms, choose mastered option which burn the disc with read only files that can be accessed on devices like XBOX 360.
Step 3
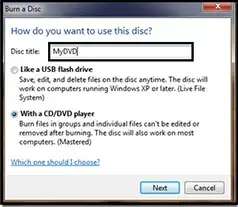
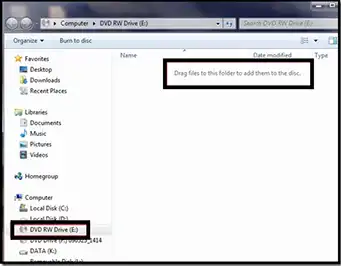
Also enter a disc title which will represent your disc. Click Next. A new explorer window will now open along with a label that reads, “Drag File to Folder…”
Step 4
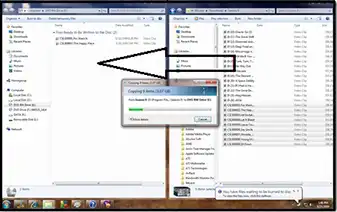
Now, using your Windows 7’s adjacent snap view; position your window on the left and the other one on the right side of the screen. You will be able to view files being transferred as they are being dragged from right window to left.
Step 5
Click on “Burn to Disc” to burn the files added to the CD.

Step 6
You can now change the disc name as per your requirement.
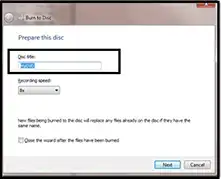
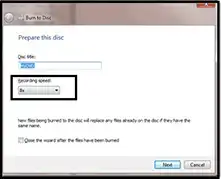
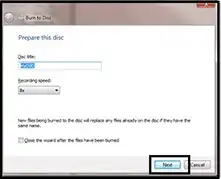
And you can also set a recording speed for the data to be burnt to CD. However, by default it will be set to the speed that is supported by the disc. Click Next to commence burning files to CD.
Step 7
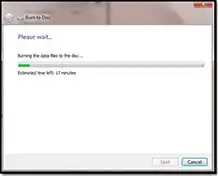
A progress bar on the window will show the remaining time and files left to burn to CD.
And you are DONE!

